

Chapter 3: Test-Driven Rails
Refactoring to Single-Assertion Specs
在預設情況下, RSpec 跑測試時會在第一個發生驗證失敗時就停下來,就是說如果下面兩個驗證都錯誤的, RSpec 就不會再去跑第 2 行。 因此就無法得知第二個驗證是否有問題,而有時會造成對編碼的解讀不明確。
1  expect(tasks.size).to eq(1)
2  expect(tasks.first).to have_attributes(title: "Start Things", size: 1)
如果每個測試中都只有一個驗證時,就會比較清楚地看出是哪個 expectation 出了問題,也是接下來要探討的題目。
RSpec 編碼風格介紹: 每個 spec 裡都只有ㄧ個 single assertion這種風格通常利用 lazy nature 的特性讓 let 去具體說明共同的行為,以及允許每個測試可以明確說明輸入值及驗證通過的條件。
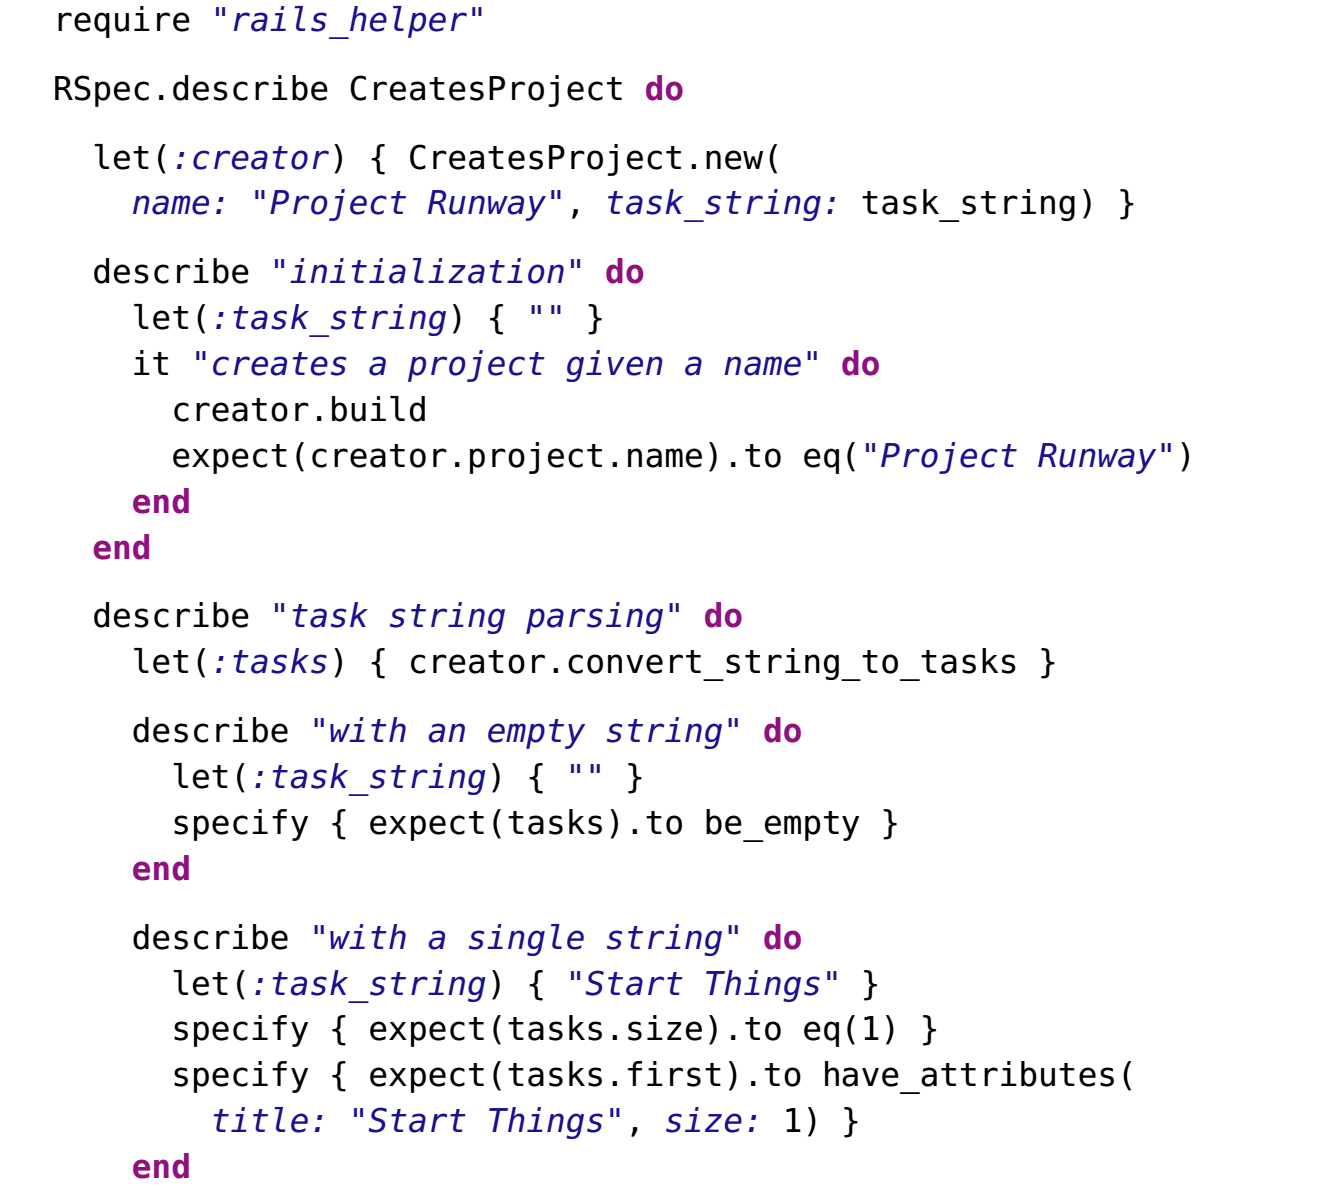
這個版本的測試風格將 assertions 分離為許多不同的 specs,並使用 specify 取代了原本的 it 來驗證區塊內的 RSpec expectation。 通常這種 specs 沒有,也不需要 descriptive comment。
注意到在此版本 specs 運作的方式稍有不同,在最外層頂端的 describe 區塊, 就 CreatesProject 的物件而言,RSpec 的 let 是用來定義 『creator』 跟『未定義的 task_string』。 然後就 creator 來說,下ㄧ個 let 則是用來定義 tasks 。
現在每ㄧ個單獨的測試都擁有自己的 describe 區塊,而個別都使用 let 來定義 creator 物件所需要的 task_strng 。這些個別的 assertions 現在都被 specify calls 包覆住了,因為這種測試風格的 assertion 都是ㄧ目瞭然就可得知其內容,所以簡單的 specify 就可以處理了。
“ When each assertion references tasks, RSpec calls the let block for tasks, which references creator, lazily triggering that let block—which in turn references task_string, which triggers the let block in that particular test case. ” ― Rails 5 Test Prescriptions ―
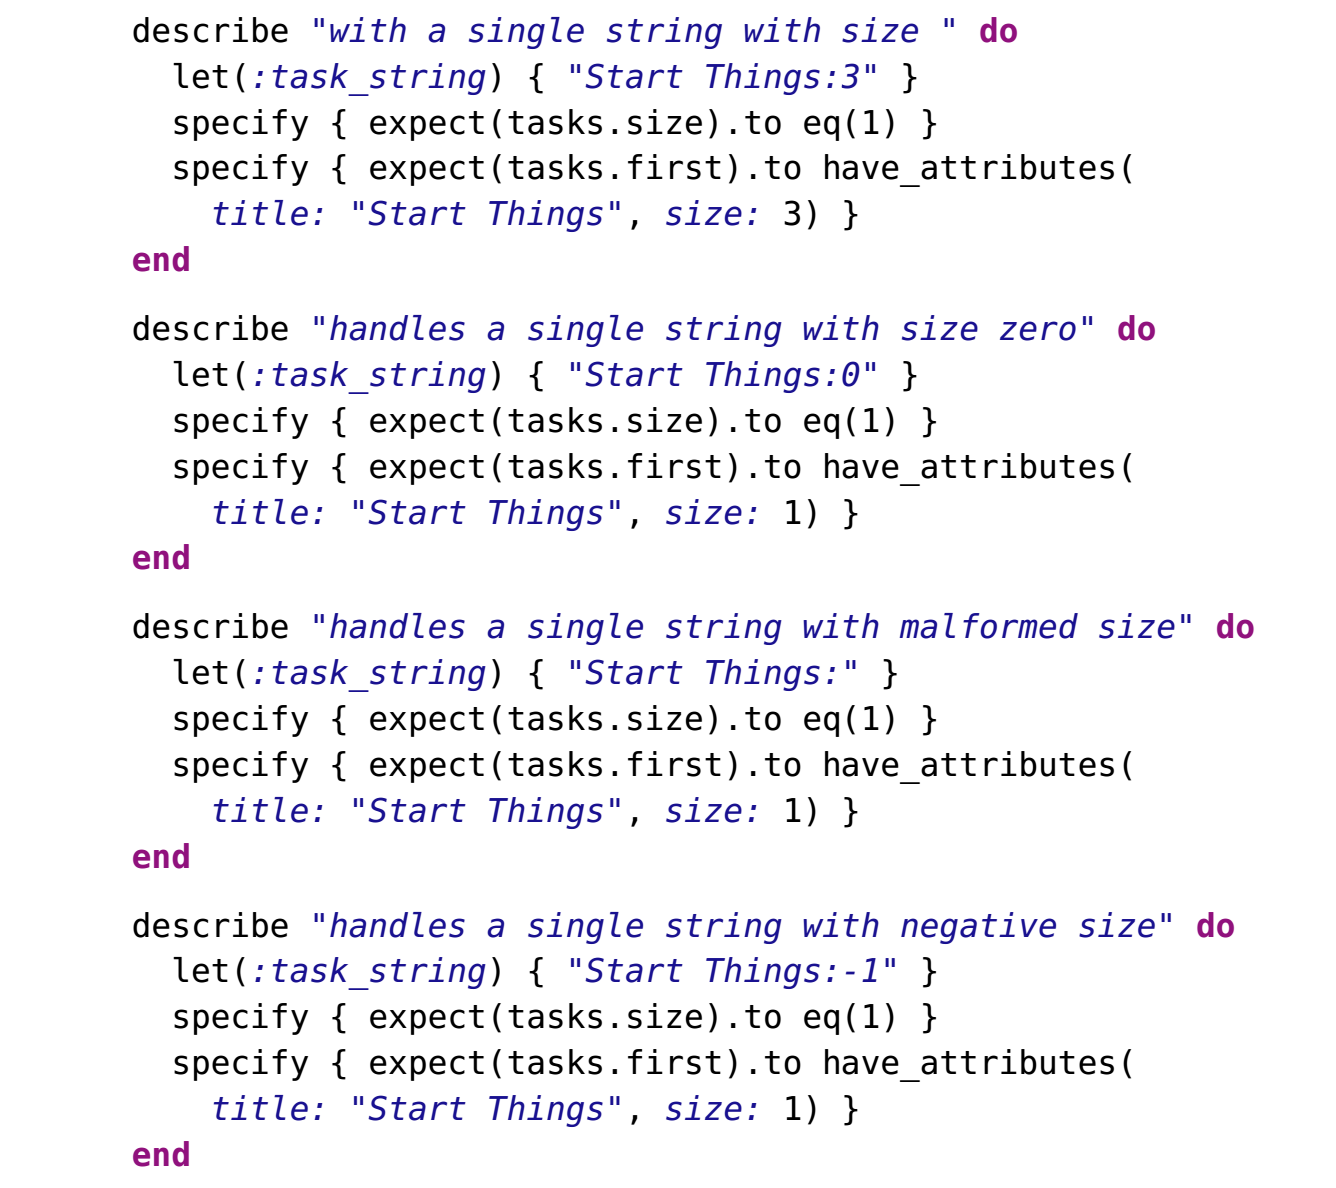
“Single-assertion” 設置方式允許每個 test case 能更清楚地表達個別的不同之處,也就是 task_string 變數。 在之前的版本,並不能特別強調 task_string 在不同 spec 的變化。
然而,這樣的設置卻也會增加追溯 execution 的難度,特別是如果你不熟悉此種測試風格式。另ㄧ個問題是這種設置會需要運行的更多次,也就是測試將會隨著設置的複雜度提高而變得更慢。
如果你真的喜歡 “Single-assertion” 風格,作者建議可使用 rspec-given gem,可讓你將 let 和 specify block 替換為 Given, When, 和 Then。
這樣的好處是你就可以把 specify { expect(tasks.size).to eq(1) } 替換為更直接明瞭的 Then{ task.size == 1}。
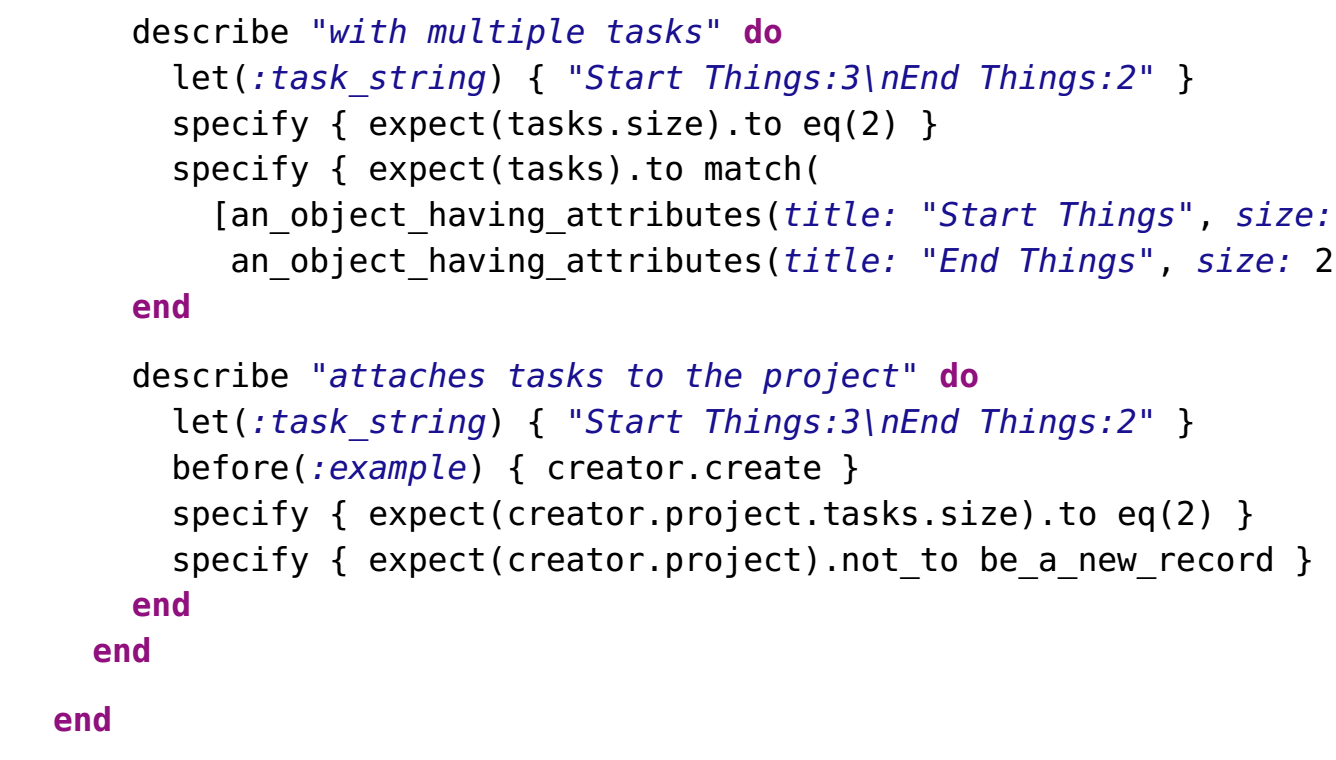
如果你喜歡 multiple assertions 所具備的快速優點,但也想要收到不只是第一個 RSpec expectations 提供的錯誤訊息。 要知道在預設情況下, 以下面例子來說,當expect(creator.project.tasks.size).to eq(2) 失敗的時候, RSpec 就直接會跳出而不去跑第二個 Expectation。
it "attaches tasks to the project" do
  creator = CreatesProject.new(
      name: "Project Runway", task_string: "Start Things:3\nEnd Things:2")
      creator.create
      expect(creator.project.tasks.size).to eq(2)
      expect(creator.project).not_to be_a_new_record
end
因此如果你想看到所有可能會出現的錯誤訊息,你需要加上 :aggregate_failures 為第二個引數在 describe 方法中:RSpec.describe CreatesProject, :aggregate_failures。
Who Controls the Controller?
回到之前未通過的 end-to-end 測試,仍然存在著 ProjectsController 找尋不到 create action 的錯誤。 不過現在已經擁有組裝 create action 的全部零件了。
接下來要問自己的問題是:需要特別對 controller 撰寫測試嗎? 答案是 “不”,至少不是以我們介紹的工具。
另外作者認為 controller tests 感覺像是 integration tests 的複製品,既然在 Rails 5 已經改善 integration tests 的測試速度,controller tests 就變得越來越不重要了。
作者選擇將 business logic 放置在 workflow 物件裡,因此在 controller 裡就沒有存在太多的邏輯。不過 controller 還是有它的功能性,除了傳送資料給 workflow object 和 view layer 之外,特別是當 action object 出現錯誤或是有預想不到的行為,也會需要在 controller 做例外處理。
在目前的選擇的測試結構上, 這些撰寫在CreatesProject 的 functions 是被 system test 所控制的。 換句話說,任務的建立及儲存的邏輯都是獨立於 controller。
加入 create aciton 在 CreatesProject class
class ProjectsController < ApplicationController
  def new
    @project = Project.new
  end

  def create
    @workflow = CreatesProject.new( name: params[:project][:name],
                  task_string: params[:project][:tasks] )
    @workflow.create
    redirect_to projects_path
  end
end
選擇以『建立不同的 class 來封裝邏輯和工作流程』,能讓 controller action 更直接簡單就了解。你也不用擔心 Rails’ strong parameters 的問題,因為這些值都是直接從 params hash 很明確地取得的。
解決 “create action not found” 錯誤後,再度面臨到路徑轉到 index 的錯誤問題。
A Test with a View
重新再回想一下 end-to-end test:
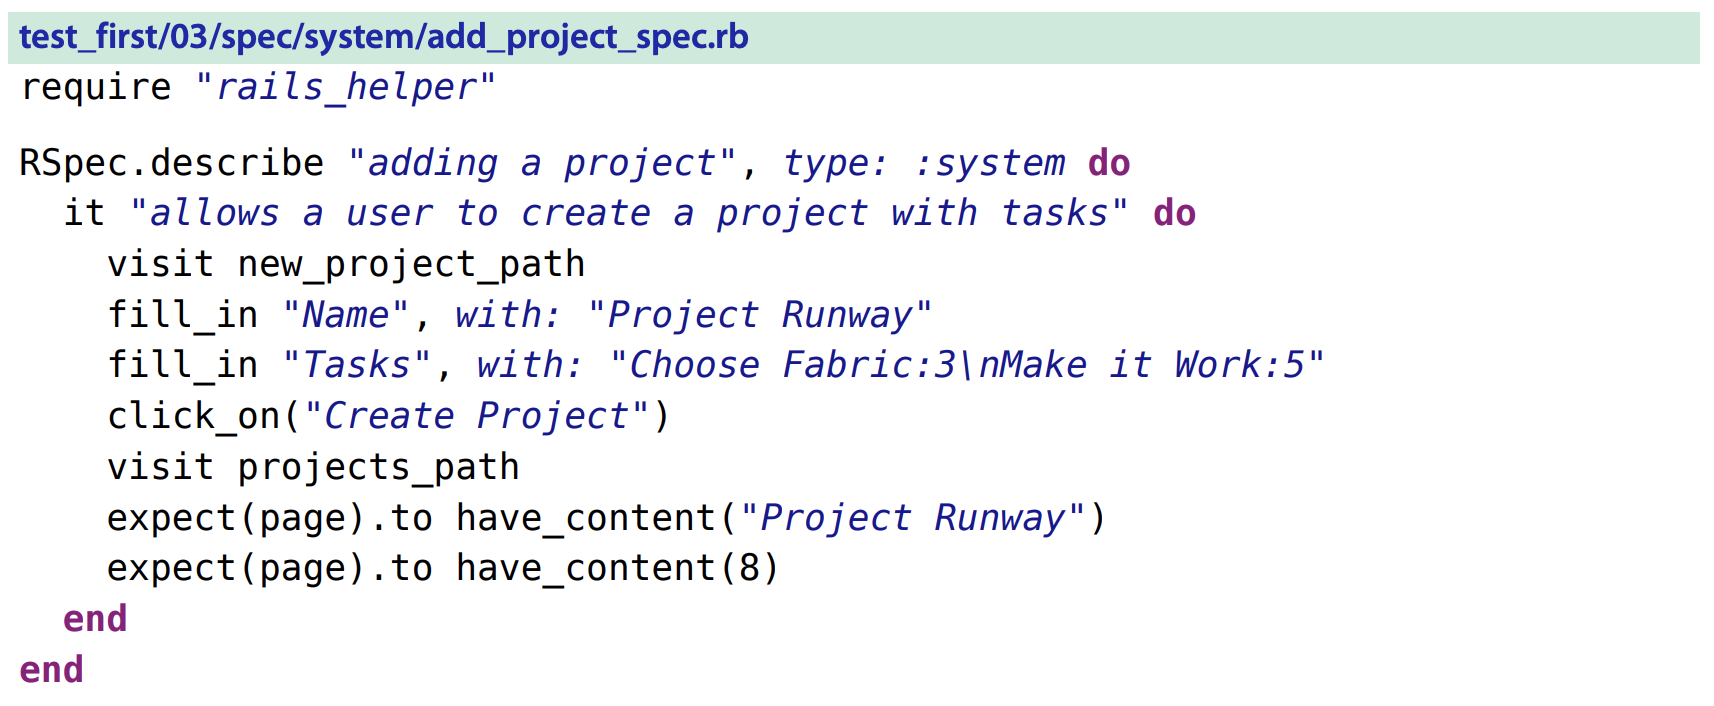
目前為止,我們已經能讓測試成功通過 controller 裡的 create action。 當測試中 click_on 完成後,路徑會轉到我們還沒有建置完成的 projects_path 上面,因此又再次得到正確的錯誤訊息:The action 'index' could not be found for ProjectsController
所以新增 index action
def index
  @projects = Project.all
end
但是還沒有建立 index action 所對應的 view,因此得到錯誤訊息:ActionView::MissingTemplate: Missing template projects/index,….
接著我們在 index.html.erb 檔案裡,設計基本表格來顯示專案的名稱及規模大小。
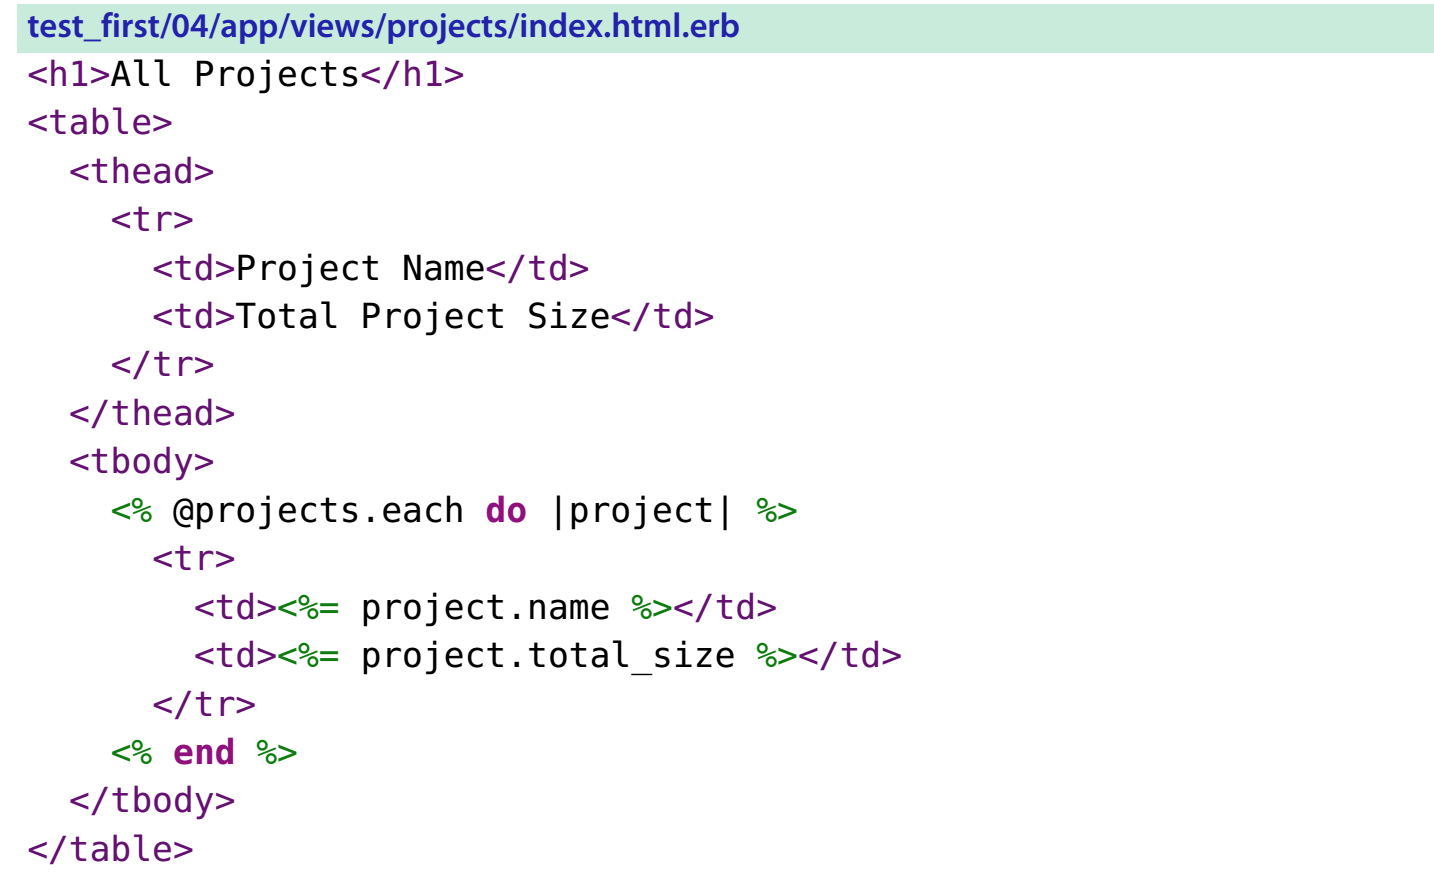
雖然加入以上檔案後就可以通過測試,但這是一個很弱的測試,因為 ”8“ 這個字串是有可能以很多不同的方式呈現。例如:在相同頁面上,”8“ 代表的可能是使用者的ID, 或是任務的優先順序。
“The struggle when viewtesting is to find a balance between a test that validates something meaningful about the output and one that isn’t so tied to the markup that it will break when a designer looks at the page cross-eyed.” ― Rails 5 Test Prescriptions ―
我們又再次回到重構程式碼的階段了,目前並沒有撰寫太多程式碼在這個步驟,但是可以利用 Capybara-Rails 所提供的 has_selector matcher 對 end-to-end test 來重構及優化。作者以本身經驗談到當他有困難想像 view 檔案該如何呈現,他會先隨便撰寫ㄧ個可以通過的測試就好。之後看到比較確切的 view 之後,再來提高測試的強度。
這個 has_selector 的用法與 jQuery-style selector 雷同,以 # 代表 DOM ID, 跟 (.) 代表 DOM class。 如果該頁面能有符合測試裡的 DOM ID,這個測試就可以通過。你也可以在該頁面明確的指定字串必須要符合測試所設定的 text (或是符合particular regular expression) 才可以通過。
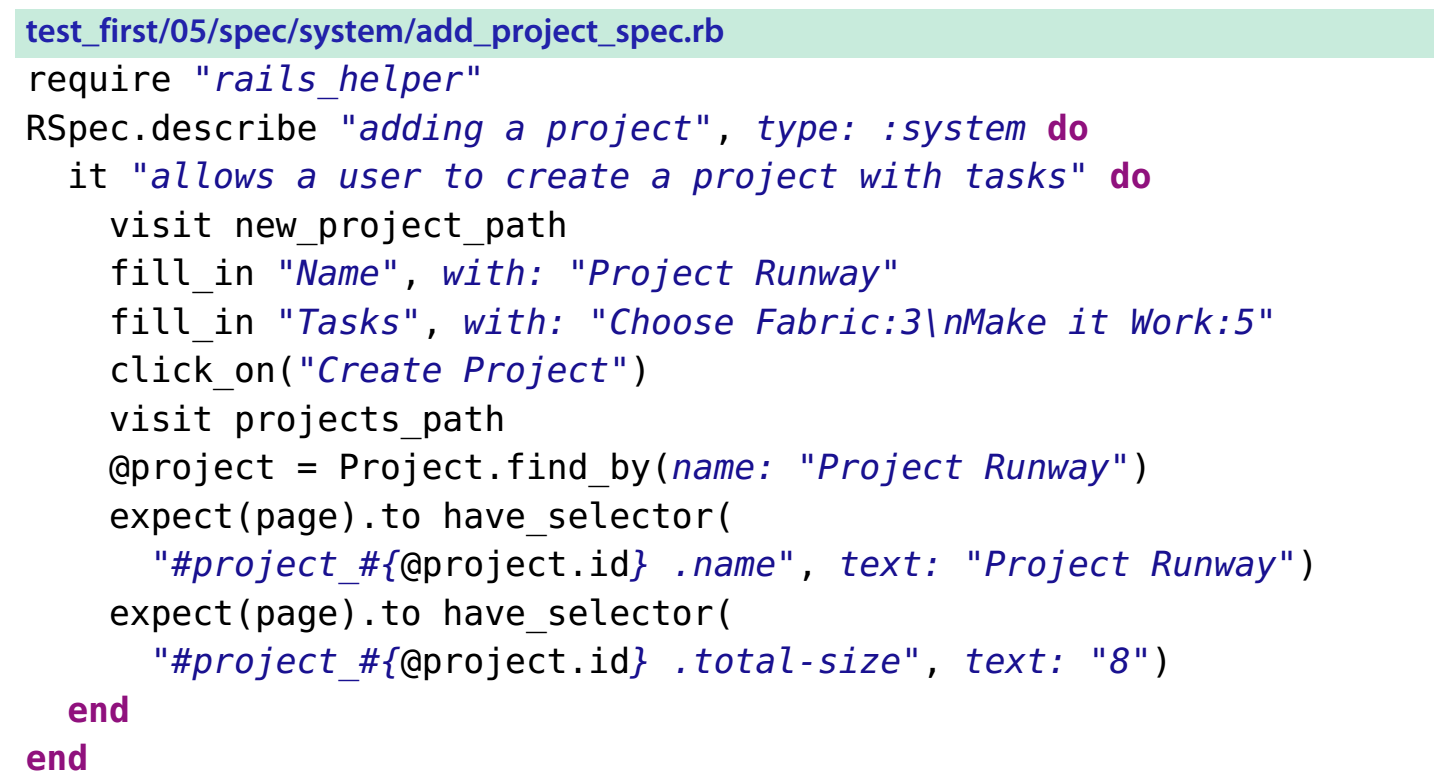
在以上的 end-to-end 測試中的最後兩行是同等於前個版本的2個 RSpect Expectation。 差別在於使用 has_selector matcher 強迫要驗證的元素必須在該頁面的特定位置。 被驗證的字串必須連結上設定的 DOM ID(代表 project.name),以及 DOM class 代表 type。 優化後的測試不會隨便讓頁面出現的 ‘8’ 造成測試的通過,因為這個 ‘8’ 必須要與任務規模作連結(代表 total-size)。


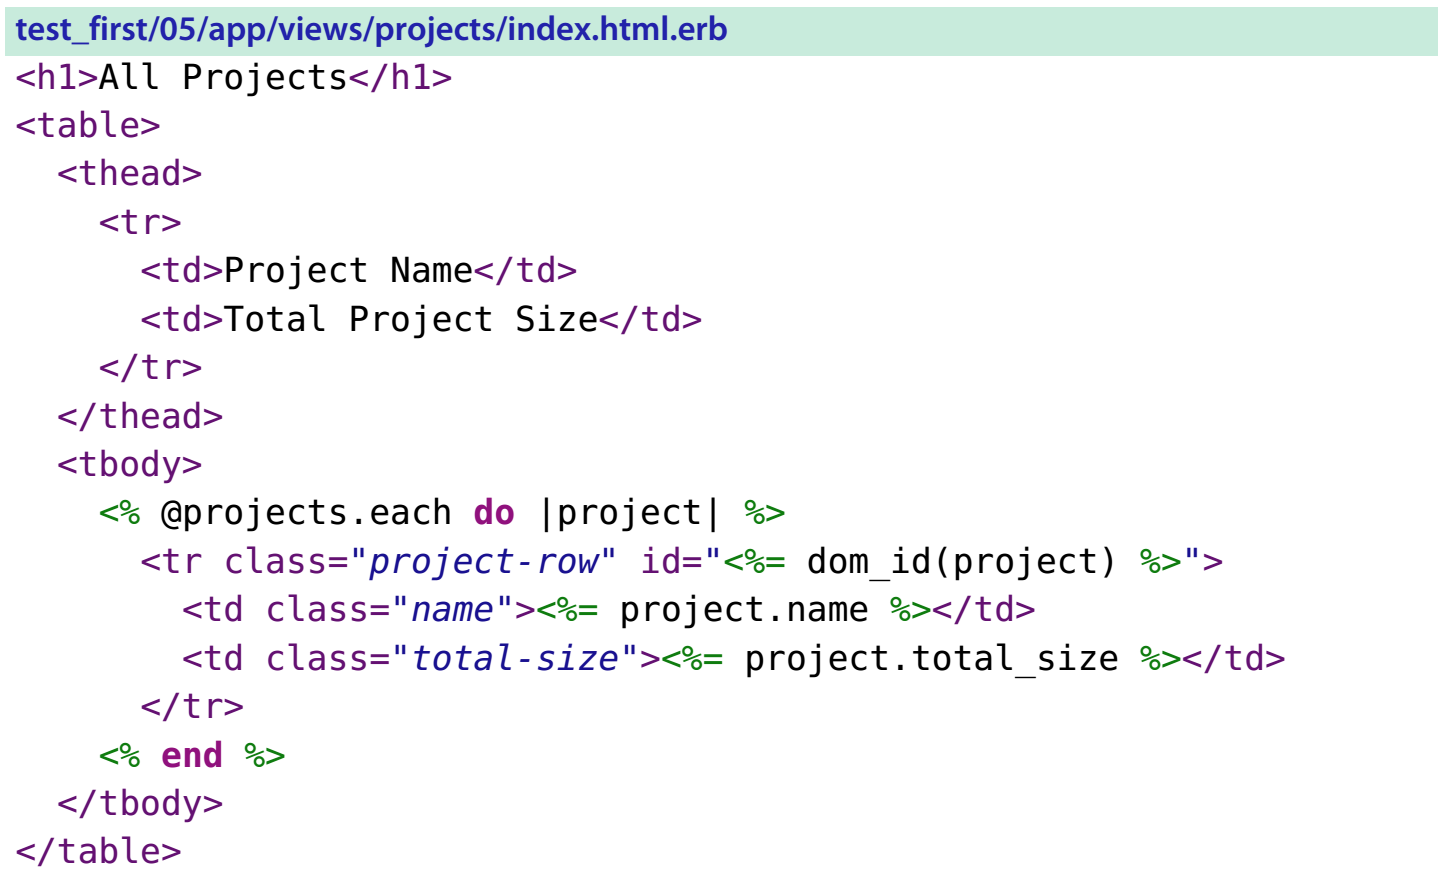
以下頁面簡單地包含需要通過測試的 DOM ID 以及 DOM Class,但只要專案的規模大小(project.total_size)可以在相對的專案名稱(project.name)裡被定位,其實可以加入許多酷炫的特效或是設計都沒有問題。
Testing for Failure
程式故障永遠是可能會發生的,因此我們也需要對『程式故障』撰寫測試。 作者認為在 unit tests 中來做 failure-path testing 會比在 end-to-end tests 裡做更好,原因是程式故障的反應通常能在單一 component 裡被找到,但需要整個系統都運行無誤才能稱為成功。 話雖如此, 有個 end-to-end failure test 針對ㄧ般使用者會容易造成錯誤的測試也是很有用的。
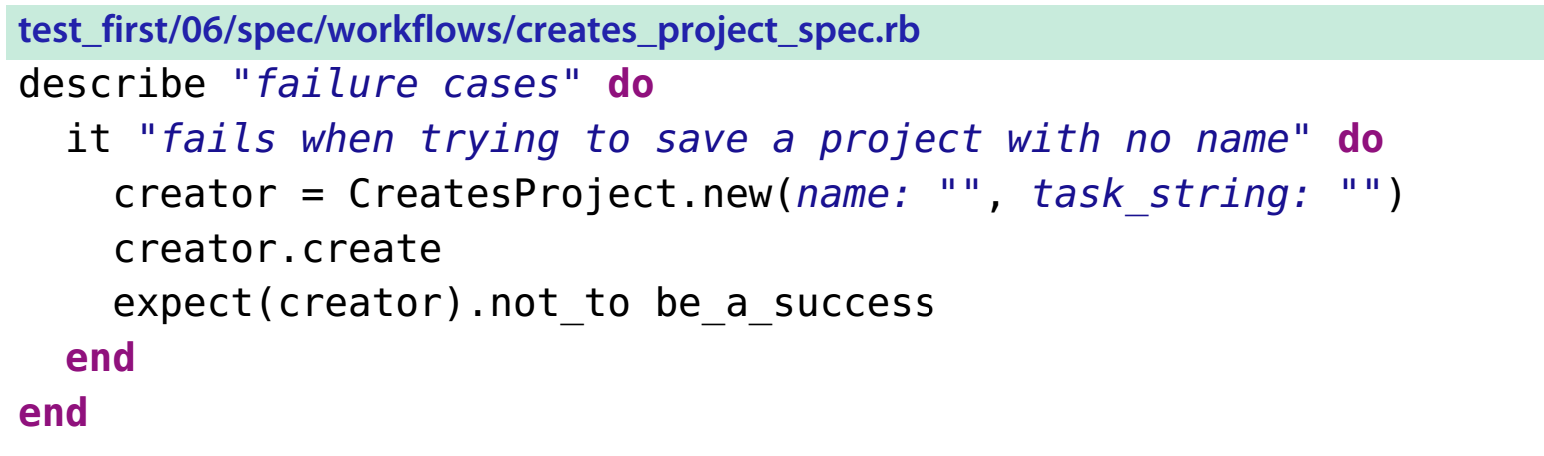
下面是ㄧ個 end-to-end failure 測試的例子:
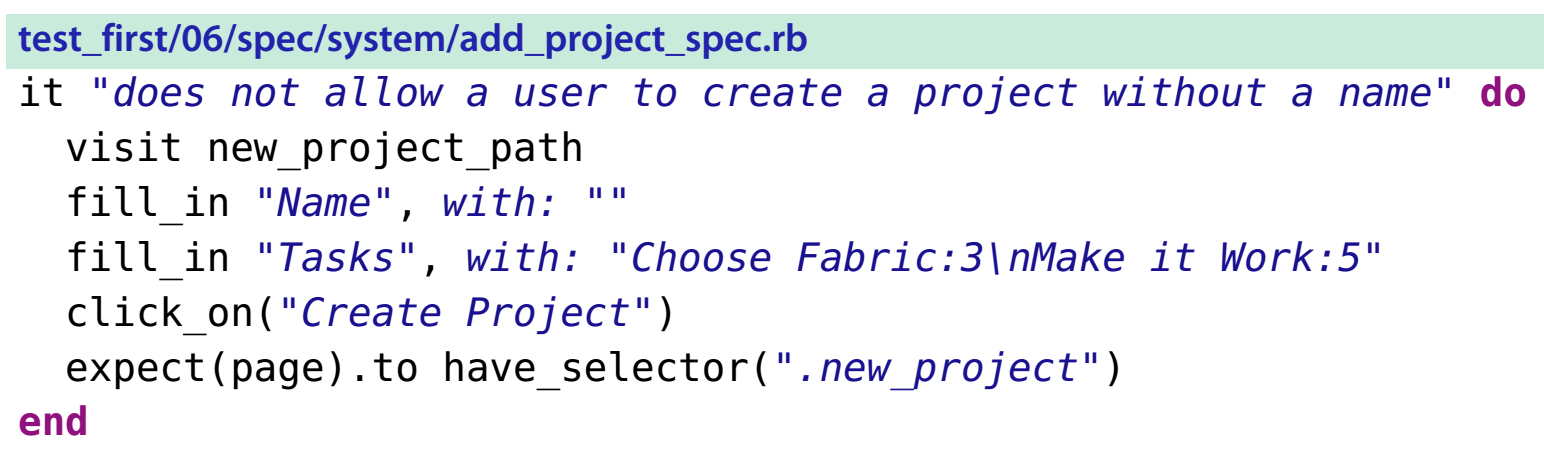
除了名稱欄位是刻意空白外,上面測試範例跟原有的 feature test 其實是很類似的。 你可以選擇不要放 fill_in "Name", with: "Project Runway" 這ㄧ行,不過換成 fill_in "Name", with: " " 更能夠凸顯要驗證的標的。 在驗證部分,在尋找 .new_project class, 也剛好就是 Project 表單的 DOM class。 換句話說,這正是在檢查網頁是否有重新回到正確的頁面上。
當然測試是會失敗的,因為我們並沒有設置儲存錯誤的機制。我們需要的是讓 workflow 來負責指出儲存錯誤,並且當儲存失敗的情況下,controller 需設定路徑,能夠重新回到新增任務頁面,而不是專案列表頁面。
我們應該對這種情況,在 workflow 層級上,再新增ㄧ個測試:
(At this point, you could also refactor the tests to change the original let block for creator to take the name as something defined by later let calls, the same way you already do for task_string, so as to keep this test in line with the pattern of other tests.)
你現在已經有了兩個驗證會失敗的測試。 你可以修改設定,讓 RSpec 只跑未通過驗證的測試。 在 spec/spec_helper.rb 檔案裡,把以下備註取消掉
config.example_status_persistence_file_path = "spec/examples.txt"
新的設定等於是告訴 RSpec 保留執行期的資訊在 spec/examples.txt 檔案內。你可以把該檔案加入到 .gitignore 檔裡。
現在你再跑一次 RSpec 就會產生檔案 spec/examples.txt 如下圖:

無論如何,現在你有了以上資訊,以及兩個有用的 RSpec 指令:
-
rspec --only-failures
RSpec 將只會跑在 examples.txt 檔案中,驗證沒過的測試
-
rspec --next-failure
RSpec 將會跑在 examples.txt 檔案中,驗證沒過的測試,但是在第一個測試失敗後就會停止。
另外你撰寫測試的順序也就會是在 examples.txt 檔案中,由上而下的順序。
接著在 model 資料夾內的 project.rb 加入以下程式碼:
validates :name, presence: true
現在你可以利用 workflow 內的資訊來判斷儲存是否有發生錯誤。
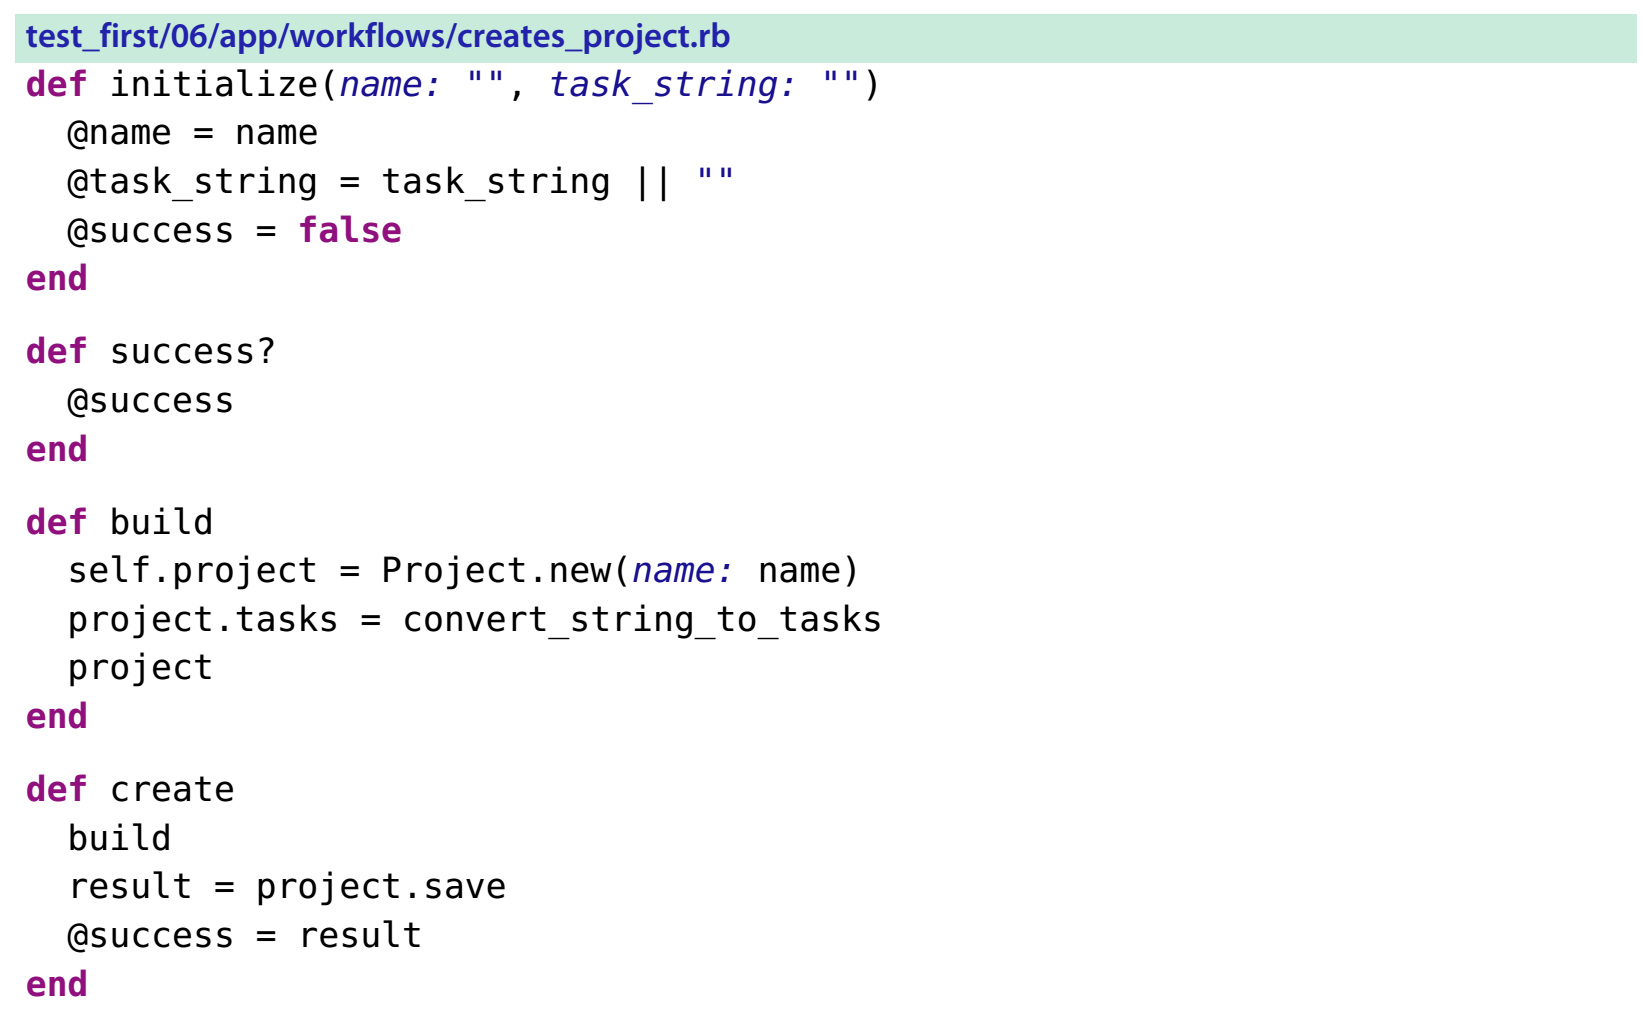
注意到 @success = false 已被設定為 CratesProject 的初始值之一。 這代表只有在 create() 方法中,在專案能成功被儲存的情況下,變數 result 的值會是 true,而 @success 也才會變成 true。
如此一來,之前的 workflow 測試就會通過了,原因是在 project model 所設定的 validation 會造成專案儲存失敗, 變數 result 就得到 false,而 @success 也會維持 false。 當詢問 success? 方法時,就會回傳 false 所以測試中的 expect(creator).not_to be_a_success 就會通過驗證。
下一步就是讓 controller 能夠選擇當專案儲存失敗時該如何做:
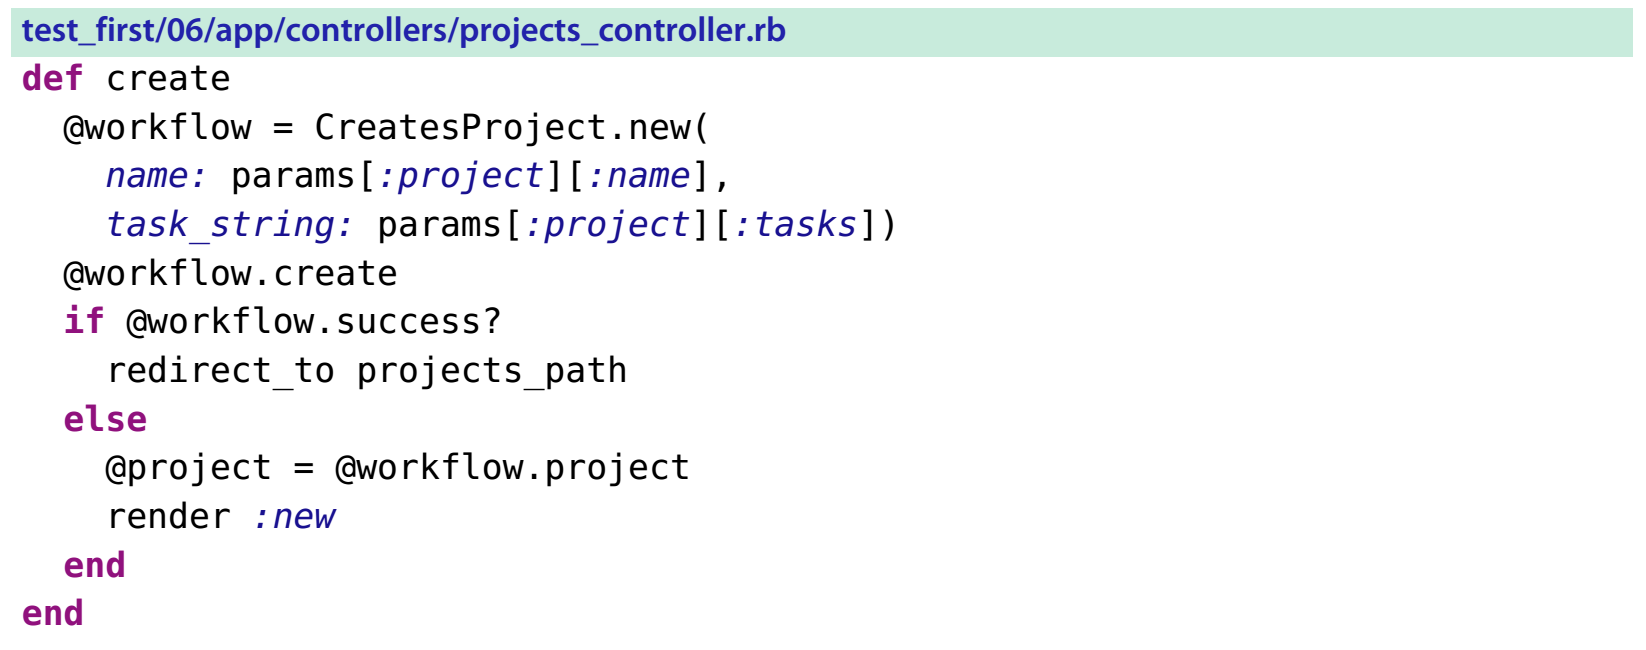
當 workflow 被要求要建立專案時(create),會先詢問 @workflow.success? 如果回傳 true, 就會重新讓頁面導向專案列表頁面(index)。但如果回傳 false, 專案儲存失敗,@project 不會儲存在資料庫內,但是在 @project 身上的 params 還在,會重新導入 controller 的 new action,再回到原本的新增專案頁面上。
Comments