

What is Nested Form (巢狀表單) ?
我們經常能看到巢狀表單的蹤影,例如:註冊使用者時會需要填寫多個收件人地址或是聯絡電話等…。 簡單來說,當需要處理兩個不同的 model 在同ㄧ個表單內執行就經常會使用到巢狀表單來開發。 有關於巢狀表單的介紹可以參考 RailsGuides,以及中文手冊。
首先建立ㄧ個示範專案
- 在終端機內輸入
rails new dynamic-nested-form -m https://raw.githubusercontent.com/kevin0117/rails-template/master/my_template.rb -d postgresql
建立ㄧ個簡易的商品入庫示範系統
- STEP 1: 在終端機內輸入:
rails g scaffold purchase_order title - STEP 2: 建立 product model,在終端機內輸入:
rails g model product title weight:decimal price:decimal quantity:integer storage_price:decimal purchase_order:references這樣會在 product table 建立 “purchase_order_id” 的欄位以及 index 以方便搜尋。
實作方法(ㄧ)
安裝 Cocoon Gem
Cocoon 套件主要是讓開發者能更輕易地使用巢狀表單。
以 Rails 6 為例,安裝的步驟如下:
- Step 1: 可從 Rubygems 下載最新版本
gem 'cocoon', '~> 1.2', '>= 1.2.15'接著記得要 bundle install !!
- Step 2:在終端機內輸入
yarn add @nathanvda/cocoon - Step 3:在 app/javascripts/packs/application.js 檔內,加上
require("jquery")
require("@nathanvda/cocoon")
Follow Basic Usage
- Step 1: 在 Product 和 PurchaseOrder model 中修改進貨單與產品的關聯
  class Product < ApplicationRecord
    belongs_to :purchase_order
  end

  class PurchaseOrder < ApplicationRecord
    has_many :products
    accepts_nested_attributes_for :products, reject_if: :all_blank, allow_destroy: true
  end
- Step 2: 修改 PurchaseOrder controller 裡的 Strong Parameters
  def purchase_order_params
    params.require(:purchase_order).permit(:title, products_attributes:[:id, :title,:weight, :price, :quantity, :storage_price, :_destroy])
  end
Follow SimpleForm
- Step 1: 在 purchase_orders/_form 加入
  <%= simple_form_for(purchase_order) do |f| %>
    <div class="form-inputs">
      <%= f.input :title %>
    </div>

    <h3>產品</h3>
    <%= f.simple_fields_for :products do |product| %>
      <%= render 'product_fields', f: product %>
    <% end %>

    <div class="links">
      <%= link_to_add_association '新增產品', f, :products, class:"btn btn-info" %>
    </div>

    <div class="form-actions">
      <%= f.submit class:"btn btn-primary mb-2 mt-2", value: "送出" %>
    </div>
  <% end %>
- Step 2: 在 purchase_orders/_product_fields 加入
  <div class="nested-fields">
    <div class="form-group">
      <%= f.input :title, label: "名稱", class: "form-control" %>
      <%= f.input :weight, label: "重量", class: "form-control" %>
      <%= f.input :price, label: "價位", class: "form-control" %>
      <%= f.input :quantity, label: "數量", class: "form-control" %>
      <%= f.input :storage_price, label: "單件入庫成本(重量 x 價位)", class: "form-control" %>
      <%= f.hidden_field :_destroy %>

      <%= link_to_remove_association "刪除", f, data: { confirm: "確認刪除嗎?" }, class:   "btn btn-sm btn-danger mt-2" %>
    </div>
  </div>

實作到這裡就完成的基本的巢狀表單,但是當某個產品的屬性需要作運算或是回傳資料庫,就會遇到問題了。
舉例來說: 在建立產品進貨單時,每次都需要手動計算『單件入庫成本』似乎是很麻煩的事情。 就計算的部分來說,基 本的 Javascript 語法就可以處理了。但是要動態綁定每個『價位』以及『重量』的欄位就沒那麼容易了。
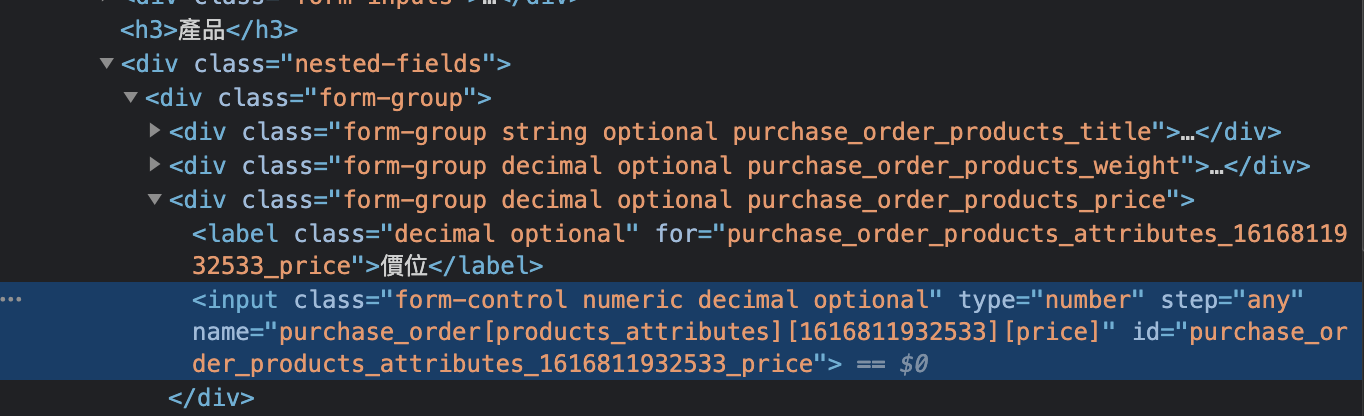
因為每個欄位的 ID 都是依照 Rails 中的 sanitized_object_name() 和 sanitized_method_name() 方法來產生 ID。因此為了要綁定欄位的值來做計算,就會需要借助以上兩個方法。
- Step 3: 在 app > helpers > purchase_orders_helper.rb 加入以下方法:
  def sanitized_object_name(object_name)
    object_name.gsub(/\]\[|[^-a-zA-Z0-9:.]/,"_").sub(/_$/,"")
  end

  def sanitized_method_name(method_name)
    method_name.sub(/\?$/, "")
  end

  def form_tag_id(object_name, method_name)
    "#{sanitized_object_name(object_name.to_s)}_#{sanitized_method_name(method_nameto_s) }"
  end
接著使用 JS 搭配 form_tag_id() 方法便可取得各個欄位的 ID。
  const weight_id = '<%= form_tag_id(f.object_name, :weight) %>';
  console.log(weight_id);
  const weight = document.querySelector(`#${weight_id}`);
實作方法(二)
安裝 Stimulus JS
- 在終端機內輸入:
rails webpacker:install:stimulus
安裝 Cocoon Gem
- 請參照實作方法(ㄧ)的步驟來做
完成安裝 Stimulus 後,只要參考以下步驟,就不用再煩惱要如何綁住屬性欄位的ID。
- 步驟一:修改 “_product_fields.html.erb” 檔案,使用 Stimulus 的語法來綁定所需欄位的值
<div data-controller="nested-product" class="nested-fields">

<%= f.input :weight, label: "重量", input_html: { data: { "nested-product-target":"weight", "action": "blur->nested-product#cal_storage_price"} }, class: "form-control"%>
<%= f.input :price, label: "價位", input_html: { data: { "nested-product-target":"price", "action": "blur->nested-product#cal_storage_price"} }, class: "form-control"%>
<%= f.input :storage_price, label: "單件入庫成本(重量 x 價位)", input_html: { data: {"nested-product-target": "storage_price"} }, class: "form-control" %>
- 步驟二:在 app > javascript > controllers 資料夾中,新增 “nested_product_controller.js” 檔案
import { Controller } from "stimulus"

export default class extends Controller {
  static targets = [ "weight", "price", "storage_price" ]

  cal_storage_price(event) {
    event.preventDefault();
    let weight = this.weightTarget.value
    let price = this.priceTarget.value
    let storage_price = this.storage_priceTarget.value
    let result = (weight * price).toFixed(2)

    this.storage_priceTarget.value = result
  }
}
Comments